Installing Kylo
Kylo is distributed as a Virtual Appliance and in RPM format. There is also a .deb Debian package release for those using a Debian based unix distribution. There are also plans for a .tar release if for some reason you don't want to use the package manager.
In this section we cover the basic installation of Kylo using the Kylo RPM and then cover how to build the Kylo RPM from source. Building the Kylo RPM can be useful for development, debugging and testing Kylo.
Installing Kylo using the RPM
The Kylo RPM can be obtained from the Kylo.io website. Generally the latest RPM can be found through the release notes here: (https://kylo.readthedocs.io/en/latest/release-notes/ReleaseNotes.html#latest)[https://kylo.readthedocs.io/en/latest/release-notes/ReleaseNotes.html#latest].
* Note: Hopefully in the future these packages will served through an official yum repository with signed GPG keys for added security.
We first download the Kylo RPM to our server:
  # download kylo
  wget http://bit.ly/2r4P47A -O kylo-0.8.1-1.noarch.rpm
Unfortunately right now The Kylo RPM does not setup groups and users during the RPM installation as not every service has to run on the same machine. So, lets create the users and groups.
To create individual users, run the following commands on the appropriate machines:
  useradd -U -r -m -s /bin/bash nifi
  useradd -U -r -m -s /bin/bash kylo
  useradd -U -r -m -s /bin/bash activemq
The following command can be used to confirm if the user and group creation was successful:
grep 'nifi\|kylo\|activemq' /etc/group /etc/passwd
This command should give two results per user, one for the user in /etc/passwd and one in /etc/group. For example, if you added all the users to an individual machine, there should be six lines of output. If you just added an individual user, there will be two lines of output.
If the groups are missing, they can be added individually:
   groupadd -f kylo
   groupadd -f nifi
   groupadd -f activemq
If all groups are missing, they can be all added with the following command:
groupadd -f kylo && groupadd -f nifi && groupadd -f activemq
Next, we install the Kylo RPM:
  # install the kylo RPM
  yum install -y kylo-0.8.1-1.noarch.rpm
In order to setup Kylo, we need to setup a database using either MySQL or PostgreSQL.
The package would have created the /opt/kylo directory. This is the main directory for the Kylo application. Go to /opt/kylo/setup/ and run the setup-wizard.sh script:
  #
  cd /opt/kylo/setup
  ./setup-wizard.sh
Building Kylo from Source
The Kylo package can be built from source using Maven. It is also possible to build Kylo using Maven with an IDE such as Intellij or Eclipse. For the purposes of this short book, we will build the RPM using Maven based on the job schedule run by Jenkins.
First we must install git and clone the Kylo repository:
  # Install git
  yum install -y git
Next, clone the Kylo repository in some location we can build from (like root home or ec2-user home):
  # Clone the kylo repo in ec2-user home, root home or some other dir.
  cd /home/ec2-user/
  git clone https://github.com/Teradata/kylo.git
Once the repo is closed we need to install and configure maven. Thankfully for us, Red Hat provides a supported maven package in the optional repository, so lets install it:
  # On CentOS, this might be available in EPEL, run yum install epel-release -y first
  yum install -y maven
Once installed, maven can be executed using the mvn command. Red Hat's package will most likely be older than the upstream maven release, which can be used instead.
Next we will attempt to build the kylo project. This is pretty easy:
  # cd into kylo directory, export options for maven, run the build command
  cd /home/ec2-user/kylo
  export MAVEN_OPTS="-Xms2g -Xmx4g"
  mvn clean install -DskipTests
Eventually you will end up with a message like this:
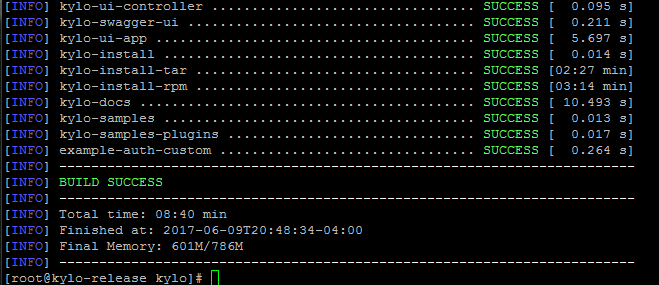
This process builds not only the RPM, but also the DEB package and the tar.gz package. In the current project, they can now be found in this directory:
[root@kylo-release install]# ll /home/ec2-user/kylo/install/
total 4
drwxr-xr-x. 2 root root  37 Jun  9 20:14 bin
drwxr-xr-x. 3 root root  32 Jun  9 20:14 install-debian
drwxr-xr-x. 3 root root  35 Jun  9 20:45 install-rpm
drwxr-xr-x. 4 root root  46 Jun  9 20:42 install-tar
drwxr-xr-x. 2 root root  29 Jun  9 20:14 license
-rw-r--r--. 1 root root 713 Jun  9 20:14 pom.xml
drwxr-xr-x. 2 root root  94 Jun  9 20:14 scripts
drwxr-xr-x. 8 root root 225 Jun  9 20:14 setup
The install-rpm, install-tar and install-debian directories each house the respective packages and tar payload for Kylo. The RPM can be installed using the steps mentioned previously. Once the project has been compiled, the RPM can be found in the following directory within the source code:
[root@kylo-release noarch]# ll /home/ec2-user/kylo/install/install-rpm/target/rpm/kylo/RPMS/noarch
total 574316
-rw-r--r--. 1 root root 588097392 Jun  9 20:48 kylo-0.8.2-SNAPSHOT20170610003954.noarch.rpm